Get Ready.
It's time.
https://drive.google.com/file/d/1dcF2RGBX0Gozu1MrusZh8dxGkpvUMCcp/view?usp=sharing

Hey guys! It's been some very intense days of A LOT of work. Most of the work that I have done (if not all) are on the CCR creation, because I have most of the film opening video done already. I have been editing NONSTOP throughout the past day and a half. I'm about 3/4 done with the editing, and I plan on finishing the editing by tomorrow, Saturday, at the latest. Without further ado, let's dive in.
My editing process has been quite simple and not complicated, just VERY time consuming. Because I did the majority of the editing on my film opening video (while my partner focused on cinematography), I was already familiar with the program (using same program as for film opening- DaVinci Resolve). My script has helped me tremendously because as you could see in the last blog, all the highlighted parts were details of the visuals I wanted to add in each specific part of the video. So, my process has basically been:
1. Step One: Cutting the clips to the desired size so it flows nicely
2. Step Two: Going through the video (chronological order) and looking at highlighted notes from script
3: Step Three: Getting desired visuals and adding to each specific portion (pull from online sources, film opening video, research, or make them through websites like Canva)
4. Step Four: Adjusting sound and clip size if needed
I have been doing this throughout my entire editing process for the CCR, and it has worked out very nicely, except it's a very long process because it's a 9 minute video HAHA! Anything for perfection though! To reiterate what I've said previously, I AM VERY, VERY, VERY GLAD that I used DaVinci Resolve. It has been incredibly easy to stack clips, adjust volume on separate clips, and adding transitions. It is far easier and has a lot of more variety than iMovie. Let's look at some examples!
Here are some examples of each of the type of visuals that I am including:
Research:

Movie Clip Examples to Support Statements:
Bullet Point/Slide Info:


Hey all! Welcome back!! We have a lot to talk about today. First, let me just re-analyze my CCR Creation Planning that I mentioned last blog because I adjusted a few details. I know I said last time that I was going to film Friday and edit Saturday and Sunday, but after writing the script and planning out the "storyboard," I realized that the majority of time that the CCR will take up is the editing process because I have to add so many visuals and edits to make it interesting and interactive. SO, I changed the filming date to Thursday, which gives me one extra day to work on editing (Friday). Ok, let's officially begin now-GET READY, it's a lot.
Let's start off with the editing done to the video (pretty much finished it already). The only thing I really had left to do on the video was add the titles and credits. Even though we had previously planned this factor, we had not picked out exactly which fonts we were going to use. So, it was a little more time consuming than I though it was going to be because I reviewed other film opening examples and saw how the fonts and transitions that the credits and titles are introduced is very important in setting the mood up. My partner and I got on a FaceTime call and worked for about 2 hours on finalizing this part of the video. I wanted to work face to face with my partner because I think that this part, even though it's small, does matter a lot and deserved the attention. We re-analyzed our previous ideas in a previous blog (way back), and then analyzed other examples of tragedy drama films like This is Us (similar family tragedy drama). We noticed how most of the credits were introduced very simply and the fonts were also very simple, as the focus is more on what is happening on the screen. The simplicity also helps to add a dull tone to the production. After getting a better picture of what we were looking for, we picked out the font by going through each one and picking out the one that matches the tone and genre. The rest of the process was pretty simple. I am EXTREMELY impressed with DaVinci Resolve because it was incredibly easy to add the credits to the portion we wanted it to be added in. We followed a similar process for the title (researching and going through each font), and we finally finished this part to the video. Here is the font/transition that we picked out for the credits:
Here is the font/transition that we picked out for the title:
Alright, so first thing done. Now we move on to talk about the CCR Creation. On Wednesday, I created the script and created kind of a storyboard plan while creating the script. This was not too hard to make because I had already answered the questions like I showed last blog, so I used those answers as the main basis of the script. While creating the script, I was constantly looking at another example that our teacher, Ms. Stoklosa, provided, to just make sure I was covering everything and was on the right track. Here is a glimpse of the script I created, the highlighted parts are my ideas for what will be integrated within that specific clip/sentence (that is my "storyboard" you could say):
Hey guys! Today I will be talking about the start of our editing process for the last and longest filming portion, and also give a long-awaited film reflection for the last filming portion (where Claire is 18 years old and moving out). Without further ado, let's begin.
So for today, our editing process is similar to yesterday (just longer because there are more clips). We started off by cutting the clips to the appropriate length so that they flow correctly. Next, we edit sound. For this filming portion, there are two primary sound edits that we have to make. The first involves the first song while Claire is still in her bedroom, and the second involves the second song when Claire is in the car, leaving with her friend. Both of these songs are in the same genre (rock) because it helps to establish the mood for Claire's older self that we want to exhibit. We got both of these songs from Royalty Free Music because, just like the last filming portion, we emailed a company and asked if we could use songs by famous groups like Metallica, but they did not respond. So, we used this website which is the same as good! The two songs we picked are Power Grab and Power of Balance. After editing this into the appropriate clips in our video, we were done with the music aspect (was an easy process because we had recently done it with the last filming portion). However, when filming the clip where the second song is supposed to go (in the car), we actually played the music in the car because we wanted to compare which option sounded better. We are still debating these two ideas because they both have disadvantages and advantages, but will resolve it after we are done editing the full video (after next blog), because we want to see how both options hears in relation to the whole, complete video.
quick glimpse at our editing work for today:
That was all the editing we did today. Next time we will be finishing the editing for this third filming portion. This will include adding some lighting filters to the part where the parents are shown (similar to the first editing portion), and other details that we will finish. Now let's move on to the longly awaited filming reflection! HA!
This third filming portion was definitely the funnest to produce for me. I really enjoyed it because it involved more creative shots than the other scenes. We did not encounter any major problems while shooting these clips, but we changed a few things or added other things to make our video better. For example, when shooting the outside portion of this filming section, we added some clips like a shot of the tires as they are about to move, or the shifter as they shift towards the "go" position. This helped add the appeal that the car was leaving faster and not coming back, also adding a rebellious appeal to the video, which we really wanted to show in this last filming portion. Overall, it was a great production and it worked out very nicely. Here are some examples of the special shots we added:
clip


Hey guys! Today we will be talking about our editing for the second filming portion. This portion is teenager Claire (15 years old) as she is transitioning to her older, darker self. To remind you, it still involves some signs of hope like school papers on her desk, but there are other signs that foreshadow a dark future. For this filming portion, our editing process required slightly a bit more detail than the last, but was overall not too long. The longest filming portion will be the third filming portion as it has the longest clips and is where we will include the title and other extra details, so I'm glad that we left 2 days for that editing process. No more talking, let's get to it!
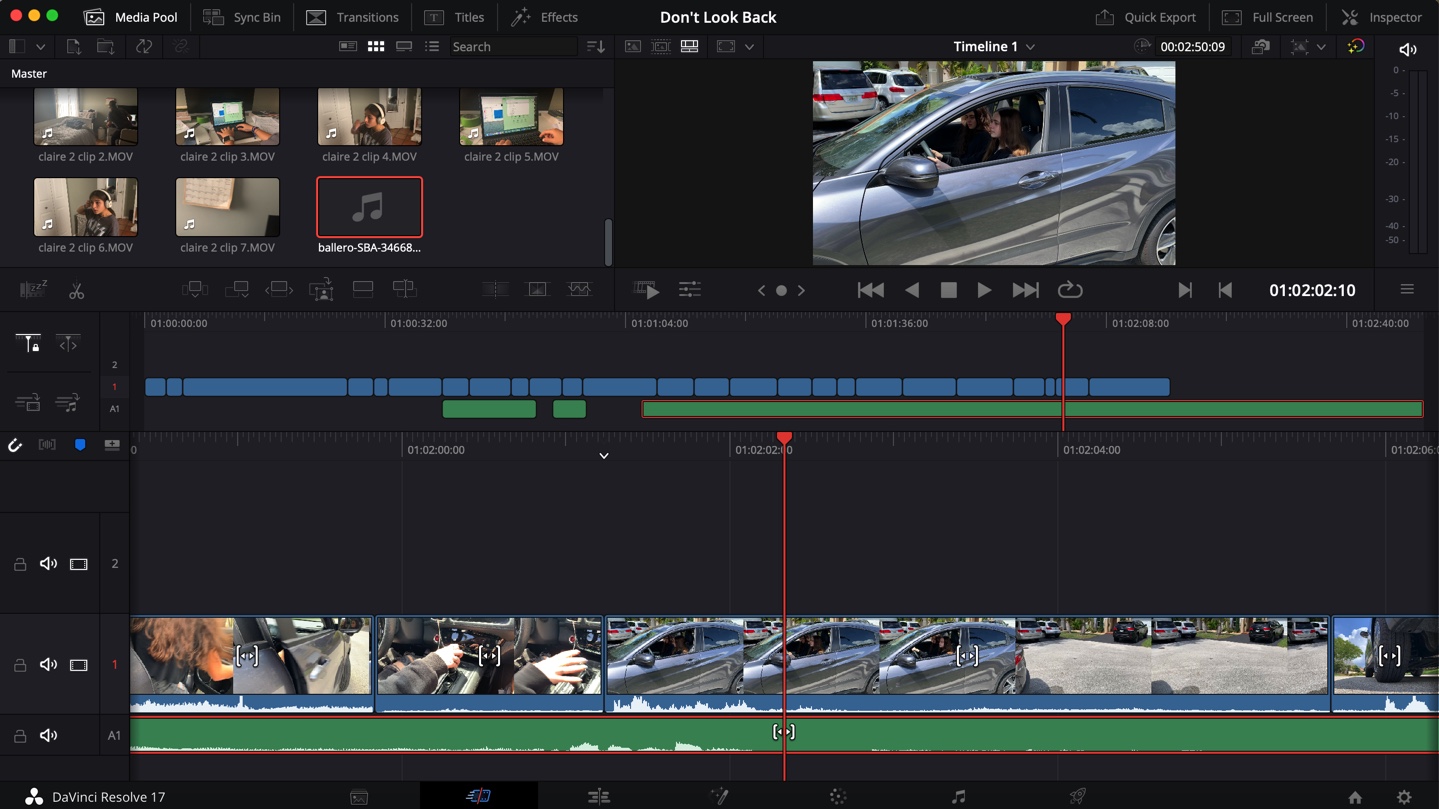
First off, we shortened the clips so that they properly fit the video and flow (like in our editing of the first filming portion). This was quick and easy. Next, we tackled the sound. In this filming portion, there are several sound factors that we need to incorporate from outside (internet and made up). In this part of the video, Claire is listening to sad music during most of the scene, so we had to research the sound for this. Like we said before (last week when we were talking about sound), we emailed a company because we wanted rights to use a song by Sam Smith in this part of our video. However, they never got back to us, so we decided that it will be easier and the same as effective to use a song from online that is already copyright free and available to use legally. For this part, we researched several websites but finalized on the song titled, "Ballero" from storyblocks.com. I added this to our video in the portion that it required, and tada! Done!
Quick Glimpse of our video editing with the sound being integrated:

Next, we created some sound effects that were needed in our video like a parent calling from a distance and parents arguing from a distance. We thought about this hard as we were not sure whether it would be better to find this sound effect online or make our own. However, there wasn't much available online, and we also concluded that because the sound is supposed to be heard from a distance, it will be very complicated to find a sound that we approve as this part of our sound effect has to be very specific. So, we made our own. This wasn't hard to make because my parents know how to yell at me (JK HAHA!), but my parents actually did take a major role in the making of this sound effect as they were the main producers. I recorded it through voice memos on the iPhone, uploaded it to the computer, and vuala! Done!
That pretty much sums up the editing for our second filming portion. The lighting did not have to be manipulated with much because the entirety of this scene is in Claire's room, so the lighting that we filmed the clips with was appropriate for the mood we want to give off. Well, that's a wrap for today. Join me next time where we will be talking about our editing process for our third filming portion and a film reflection for our production of this third filming portion (I promised this a while ago but I've had so much to write about I've forgotten! But no more waiting anymore!)
As always,
Natalia Ballinas
Research Links:
https://www.storyblocks.com/audio/stock/ballero-346680330.html
Hey guyssss!!! It's been a while but welcome backkkkk!!! I'm so excited for these next two weeks because we are going to be putting all our clips together and finally making our video come to life!!! I cannot wait to see the end product, I'm sooooo excited to edit!!! Ok, enough with the excitement and let's get to the editing.
So, for this first filming portion editing we basically put all the clips together and did some minimal editing. This first filming portion is quite small and the most normal of them all (in terms of lighting and things like that), because Claire is kind of normal in this stage of her lifetime. However, let's dive into our editing process.
First off, we cut the clips and adjusted them to make them flow and fit perfectly throughout this opening scene. Like we've said before, we are editing through DaVinci Resolve, and it is a great program that is very easy to manipulate.
After adjusting the clips, we added the parents fighting clip that we left towards later (yesterday) to film. This part of the clip involved my parents fighting in a clip so I needed to wait for when they were both present and had time to do this short clip. We added this clip into the appropriate section of our video, and adjusted its length so that it fits well.
After doing this, we added sound. The main sound portion for this first filming portion was the parents fighting sounds and the narration. My parents actually (fake) fought with words in the clip that I filmed because we could not find appropriate sound effects online. Additionally, as per the narration, we wrote down a script and then recorded me on Voice Memos on the iPhone saying this script. It was a quick and easy process, especially because DaVinci Resolve worked great in adding sound (better than iMovie).
Finally, our last editing step in this first filming portion was the lighting adjustment. Because in this first editing clip Claire is supposed to be the brightest and happiest of all the 3 stages of her lifetime, their wasn't that much lighting adjustments to make because the lighting in the video was bright enough and was the tone we wanted it to give off. However, we did apply some lighting adjustments in the parents fighting clip that is integrated within this first filming portion scene because we wanted the lighting to appear more dull than the rest of the scene. So, we played around with some filters available on DaVinci Resolve. We also decided to explore some more and looked at Clideo for some more video filters. This website had great filters that helped us demonstrate the duller aspect we wanted to give off in our video. Here is a before and after picture of how the clip changed after applying the filter:
With filter:


Well, that's a wrap for today! Join me next time where I will be editing the second filming portion!!! I literally cannot wait for next time this is coming along sooooo wellllll AHHH!!!
As always,
Natalia Ballinas
Hey guys! Today we will be talking about our transition to editing process. This will include how we will tackle this objective, and we will provide some insight on our editing scheduling that will keep us organized throughout this process. I will also give a short reflection on our filming experience for our last filming portion.
Let's get started. So for our editing process, like we've said before, we will be using DaVinchi Resolve. I have already downloaded it on my computer and have added the clips for our video. We are going to dedicate 2 weeks (Weeks 7 and 8) to solely editing (will also work on CC creation in between). Here is a glimpse of our schedule:

Hey guys! Welcome back! Today we will be talking about our process for getting access (legally) to use the music/songs that we want to use in our video.
In our music video, we are going to have 2 primary songs. The first song is a sad song, and this is the song that we will need to get access. We will get the crazy rock song that is also in our music video from a database that is copyright free. The main reason for this is because sad songs are harder to distinguish if not well known, while the angry, rock style is easy to distinguish through loud drums and other instruments that help to portray this mood. However, if the company does not reach back on time, we will have an appropriate sad song available through the copyright free database as well.
Ok so let's move on to the process. I started off my research by simply looking up how to gain access to well-known songs. I found an article published by Copyright Alliance titled, "How To Get Permission To Use A Song," and it explains how you don't need to necessarily email the music producer to gain access to the specific song, because many songs are part of SESAC, a music rights organization from the US that let's you request permission directly from the SESAC website (faster an easier). The article included the links for both finding if the song is part of SESAC, and the link for requesting access to the specific song. However, I quickly realized that the process might take a while, as SESAC is a large copyright company that has a lot of business. I still emailed them though and I received a message that they will respond within 24 hours.
However, if we do not have success through this database, we know another database that is copyright free which will also work.
After we knew how to gain access to the songs, we minimized our list to our top 2 songs, in order to focus on getting permission from these 2 songs. One of the songs is part of SESAC, while the other is not (copyright free database). We will use whichever gives us permission first, as we know that both songs would work well in our project. Here are our top 2 songs:
interscope records
1. Sam Smith- Stay With Me
2. David Fesliyan- Goodbye, My Friend
We also found a great copyright free database for the rock song in our video. The link is here for this database: https://www.serpentsoundstudios.com/royalty-free-music/metal-rock
As per the link for the sad song database, the link is here: https://www.fesliyanstudios.com/royalty-free-music/downloads-c/sad-music/1
That pretty much sums up our work for today. I am satisfied with our work today because we not only learned something new, but we also figured out which songs we are going to be using and are on the verge of finishing our project!!!
Join me next time when I will be talking about our editing process transition, as well as give an insight on our film reflection from our final filming portion that we completed this past weekend!
Until next time :))),
Natalia Ballinas
Research Links:
https://copyrightalliance.org/faqs/how-to-get-permission-to-use-a-song/


